The goal is to display a major strength of ROR : generate a create, update, delete form.
1) First you will need to setup by installing ruby (the language or rather its "interpreter") download ruby interpreter 1.8.6-26( [download page][direct])

2) install ruby

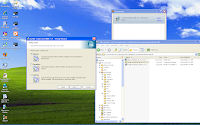
2a)Dont forget to pick a simple directory structure like c:/ruby as follows:
3) You will need to add rails to ruby so go to the directory and type gem install rails (you now have ruby on rails, phew!)
4) You will need a database so download mysql and install
5) You want to view your tables in a user friendly way through a GUI so download mysql gui tools and install (to view your tables)
Now we shall create our application:
6) create your application in your install directory so go to your command line prompt and go to your install directory (c:/ruby/)
7) create your test application "rails test"
8) Since you wish to use your mysql db you may want to setup your database connection by typing "rails test -d mysql"
 This creates a "mysql connection" by overwriting the following database.yml file
the above refers to some sqllite db ; but since the majority uses Mysql the command "rails test -d mysql" changes the code to this
Note: don't forget to put the password into the database.yml file please.
9) The "database connection" (file) says that since you are in development you are going to use the "test_development" database. This means you must have "test_development" database in your mysql db.
9a) So please create it so by typing rake db:create

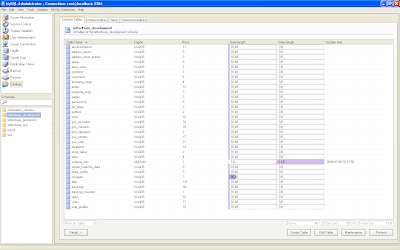
Now check to see if the databases test_development is created by going to mysql admin tool

Now finally comes the part that ruby on rails excels at, rapid development (everything else above was "setup" or the boring stuff called "exposition" whereas now the action begins):
What we will do now is create a create , update delete form with some generic fields. Usually you have to create the tables, create the view and the controller and modify or add the data layer. Loads of tedious mechanics. Not with Ruby and rails.
10) change directory to your application "test" working directory
10b) To see some form in action : Suppose we wanted to create a form where you can enter your name and age. We would like to create a table called users and views which allow us to create, update and delete. So type something like :
ruby script/generate scaffold user name:string age:integer
(the italicized words are keywords in ruby on rails. The red text defines the table you are creating. USE SINGULAR and it will create a pluralised table called users as a table name. The rest of the parameteres like name and age define the columns of this table and next to the columns is their datatype)
This will create everything above the database : the model, view and controller. What remains is the creation of the tables in the database.
11) Now to create the table in the database:
12) go to your mysql administrator page and then right click and refresh. You will see the newly created table.
13) Before we test out the form we need to start the server by typing
ruby script/server
You can see that the the appserver is up by checking it with http://localhost:3000
14) view the application by typing:
http://localhost:3000/users
It shows you the list of users which are zero right now.
(note how you have used the table name "users" (plural) to access the table and its forms although you initially specified a singular)
15) create a user by clicking on "New user" and you will see the rudimentary form:
16) After entering the information and pressing "create" you may see the list of users here:
In conclusion this just shows you how to rapidly create the foundations or groundwork for your web forms. There is a lot more to rails which makes it useful as a tool. If you feel that this is too "pre packaged" then don't. Your application is HIGHLY configurable. Rails' strength is that it can get you to a goal in the least number of steps and YET its highly configurable.


